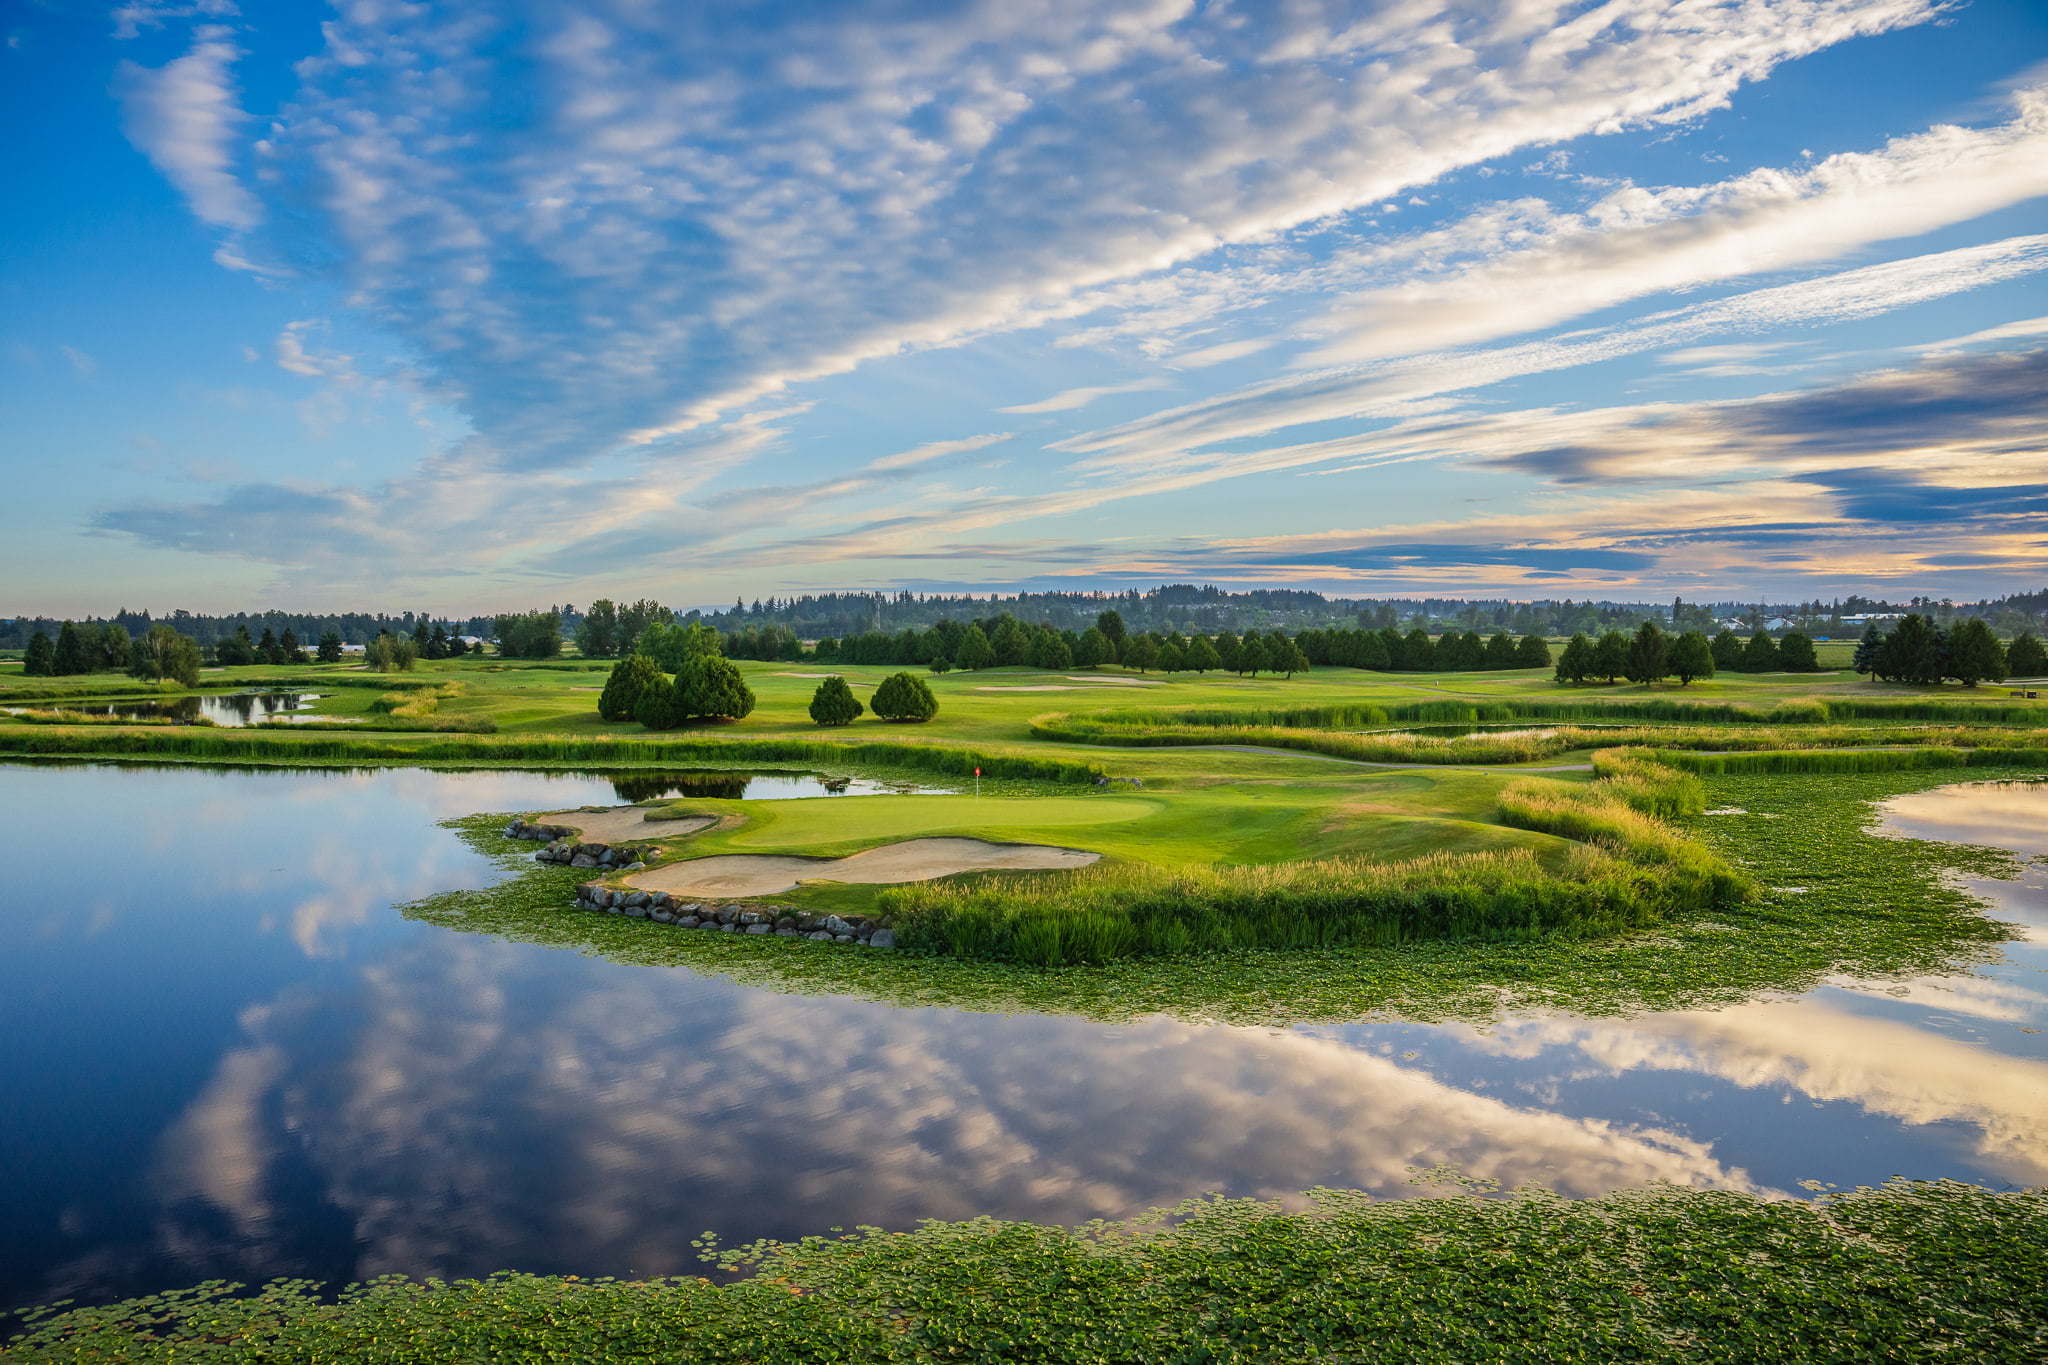
The Canal
7,100 yards of serene golf in the tradition of the old links land
Join us at Duffey’s for Happy Hour – daily – 2 – 5pm!
7,100 yards of serene golf in the tradition of the old links land
The Canal Course, a layout that plays tradition to the old linksland. Wide fairways and undulating greens await players who prefer their golf to be challenging, yet undisturbed from the sounds of everyday life. With tees ranging from 5,314 yards to the Palmer Black tees at just over 7,100 yards, the Canal Course is a perfect fit for everyone’s game.
Palmer tee – 73.6/138
Blue tee – 71.3/132
White tee – 68.8/119
Green tee – 66.9/114
Red tee – 65.1/109
White tee – 74.5/129
Green tee – 71.9/123
Red tee – 69.8/118
Need a scorecard? We’ve got you covered.

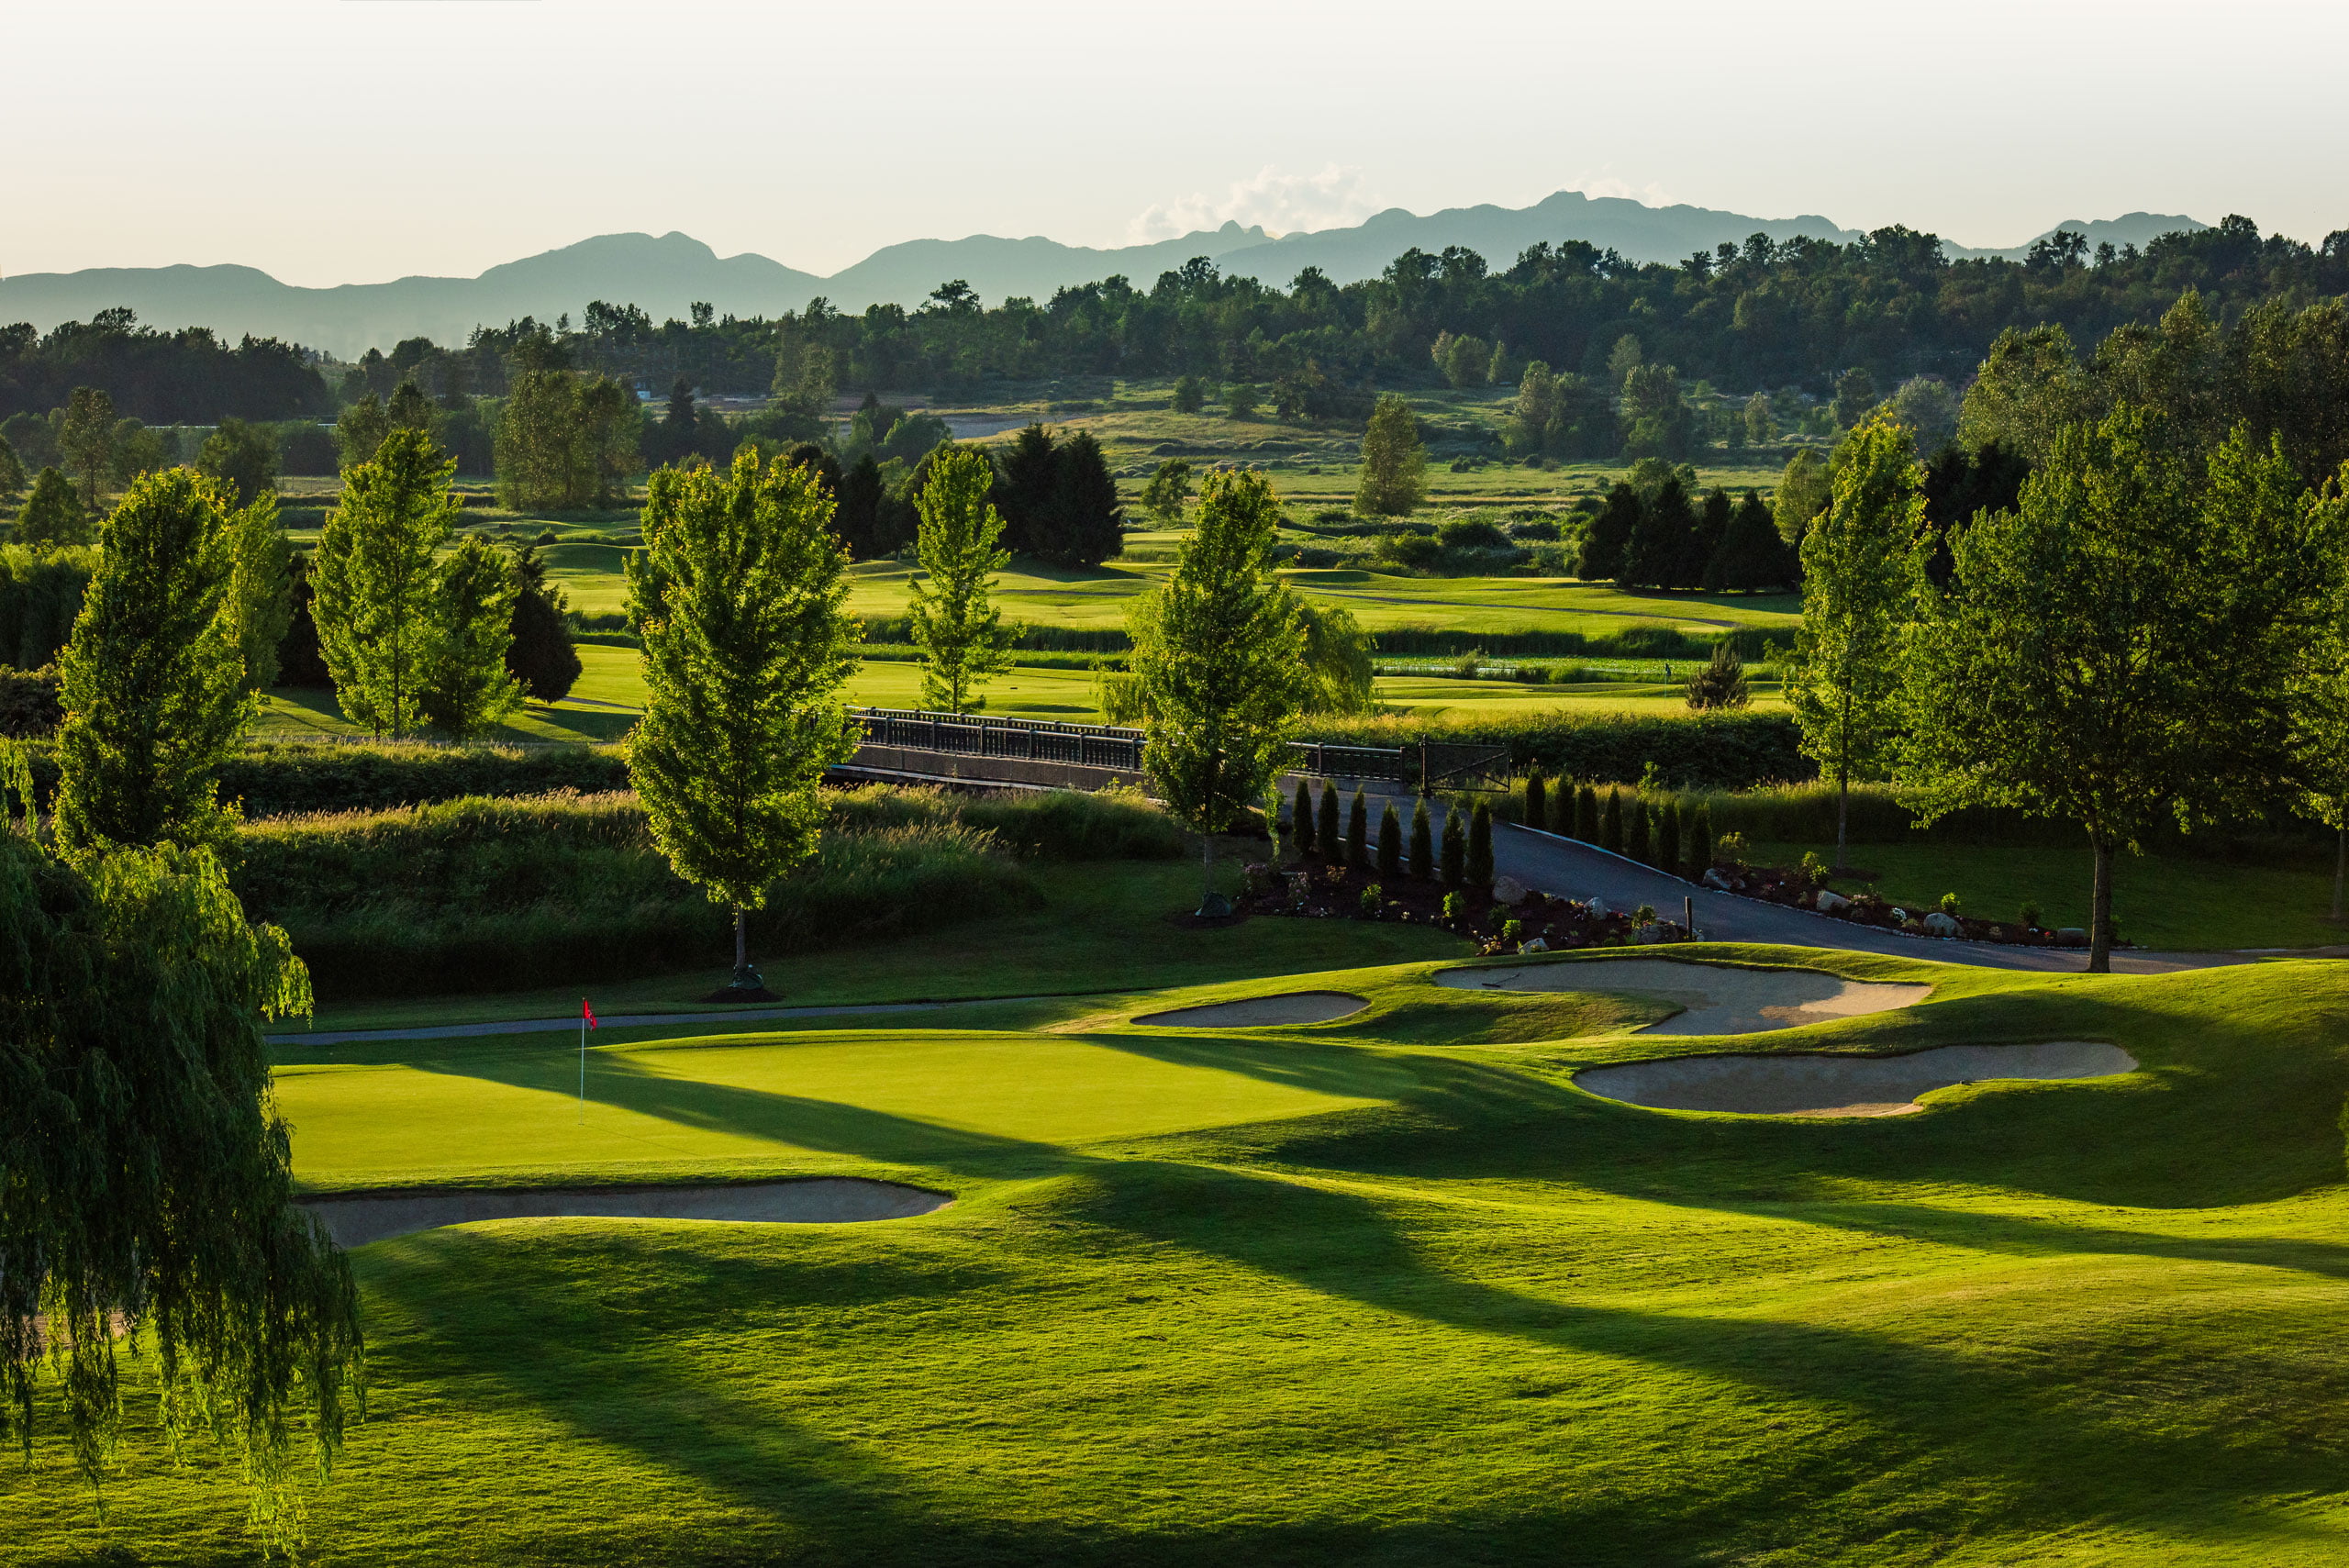
The Canal has a story around every corner. Scroll through below to take a virtual tour of the course!
A long par 5 opening hole with lots of fairway to hit with your first tee shot of the day. The first fairway bunker is not nearly the problem that the twin bunkers in your second shot landing area are. Complicated by the lake down the right side, your second shot should be planned to make your short third shot as easy as possible. If you go over this easy to putt green, the chip back could be dangerous.
A mid-length par 4 that doglegs right around a couple of bunkers into a generous landing area. Often playing down wind, a mid to short iron second shot will not release to the back of this raised, long back to front sloping green. If the pin is back, you will have to plan to get it there. Missing wide or long will leave a tricky chip or pitch back and you still will have work to do putting on this difficult green.
A long Par 3 that demands a straight tee shot to avoid bunkers left and right. The lakes to the left and right are there to frame the hole visually but might catch you napping! Putting is straight forward on another large and deep green.
For this long, dogleg left par 4, you are hitting directly into the wind. Try cutting the corner over the left fairway bunker at your own risk! Your mid iron second shot to the right to left sloping green dictates taking the “better safe than sorry” tact. Aim for the middle of this green and hope to two putt.
This longer, but generally downwind, par 4 is complicated by two lakes (one on each side of the fairway) that can be reached from the tee. A careful drive placed into the center of this wide fairway will reward you with the easiest second shot to the raised green. Play your shot to land in the middle of this undulating green and get out of there with a par quickly.
A short but scary par 3 with a lake right off the right side of the green, a bunker behind and one of Arnold Palmer’s famous “beach bunkers” waiting to swallow tee shots that land short of the severely sloped (left to right) green. While you do not want to miss this green on the right side, the left side or long spells bogey or worse! Maybe the hardest green on the course to putt.
A great mid length par 4, dogleg right. Tee shots going left or long, through the fairway into the bunkers or rough, sets up a dangerous 2nd shot. Even from the middle of the fairway, a short iron into this green presents difficulty. The slightly raised green drips off both left and right sides, with bunkers and water lurking everywhere. Although, the green is relatively flat and easy to putt, a par is no bargain on this beautifully designed hole.
A monster par 5 with water down the left side and in front of this green. Remove the stress from your tee shot and hit the straightest, longest club you have, even if it’s a five iron, favour the right for safety! For those with the Palmer flair, pull out the driver and have a go at the green with your second shot. Be prepared to pay for the risk you’re taking but the reward may be an eagle 3.
Every course has to have a hardest hole and this is it! The long (really long) straightaway par 4 features water down the left and trees on the right. The long second shot to the well-bunkered green requires calm and a cool drink because by the time you’re done with this test; you will be in need of some refreshment!
After a break at the kiosk, you should be refreshed and ready for the back 9! Another long straight away par 4, playing dead into the wind. The hazard down the left side is your first problem. This mid to long iron second shot to the slightly elevated green is straight forward, as is the relatively easy to putt green. Again, par is a good score.
This mid length par 4 features a narrow landing area for tee shots, between a bunker on the left and a lake on the right. The second shot (mid to short iron) is straight into a narrow but long sloping green that will stop your shot dead. Only average in putting difficulty, securing par on this green should be easy but don’t let your guard down.
An average length, downwind par 5 that really plays like a par 4 1/2. Let out some shaft with the tee shot and you can reach this wide but shallow green in two shots. Trying to land a soft high pitch shot on this shallow green can prove difficult. The group of bunkers short of the green on the left are as frightening as they appear. Putting on this flat green is easier than most. A good birdie or even eagle chance here.
Back into the wind you go! This tricky par 4 plays longer than the yardage because playing safe down the middle requires a long iron or fairway wood to hit the “fat” part of the fairway. Once on the fairway, you face a second shot, (mid to short iron) into a narrow green protected by beach bunkers and a lake to the left. The putting surface is flat and easy to putt, but you have to get on the green first!
A mid length par 3 with a large green that is well protected by four bunkers. Putting is tougher than average due to subtle breaks but you should be putting for birdie here after a well played tee shot.
A dogleg right medium length par 4 that begs you to cut the corner over the bunkers on the right. Play it and go straight down the middle for an easier angle approach shot. The deep green needs to be taken into consideration if the pin is in the back corner.
This short but sweet par 4 begs you to attempt to drive the green (just like Arnie) but calm down big hitter, haste makes waste! Hit your tee shot left and you’re wet, right and you’re on the beach. Play it smart with a mid iron to the middle of the fairway leaving a short iron to the very scary right to left sloped putting surface, get your par and get out of there!
Arnies revenge – Bring lots of ammo! Let’s face it, this is only a mid length par 3 to a shallow green surrounded by water on three sides with a couple of bunkers thrown in for fun. What was Mr. Palmer thinking? Do your best and don’t hold up the group behind you!
A birdie hole to finish with! A mid length par 5 that can be reached in two shots. The creek on the left and lake on the right are not as troublesome as they appear nor are the seven bunkers that outline this hole. The green is flat and easy to putt so there are not many excuses for not walking away with at least a par.